


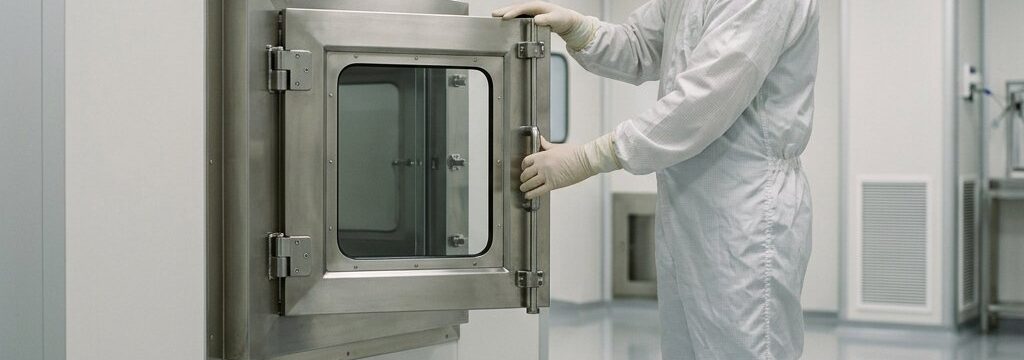
Material Transfer in Aseptic Cleanrooms

Material and equipment transfer is one of the biggest contamination risks in an aseptic cleanroom. It is precisely at the transition from a less controlled environment to a critical zone that particles, micro-organisms and residues can be introduced that are difficult to control later. Safe transfer therefore depends not only on the cleanroom class, but on the entire approach: route, packaging, handling, documentation and operator behaviour. Below, you can read in practical terms how to set up material flows on a risk-based basis, with attention to Annex 1, ISO 14644, airlocks and pass-throughs, cleaning and disinfection, and validation of the overall transfer process.
Table of Contents
- 1Why the zone boundary is the critical point
- 2Which standards and zones govern your transfer process
- 3Start with a risk assessment for each material stream
- 4Design the route first: receipt, unpacking, airlocks and transfer through
- 5Packaging and unpacking steps must be right for each zone
- 6Choose carefully between cleaning, disinfecting and sterilising
- 7Human action remains the critical link in material transfer too
- 8Translate the process into one workable SOP with status control
- 9Assure the process with validation, monitoring and evidence
- 10Common mistakes in material transfer
- Show more...
Key takeaways
- The transition to a classified or aseptic zone is a primary contamination route.
- ISO classes and GMP Annex 1 requirements complement each other, but are not interchangeable.
- Record what evidence is required before passage to the next zone, such as label checks, packaging integrity, lot information or certificates.
- Personnel and material flows must remain separated, and where relevant incoming and outgoing flows as well.
- Only the combination of the right method, correct execution and appropriate evidence makes the transfer controlled.
Why the zone boundary is the critical point
The transition to a classified or aseptic zone is a primary contamination route. Not only loose particles and fibres play a role there, but also micro-organisms, chemical residues, moisture and, in some processes, electrostatic effects. Product safety in critical areas is therefore not determined only by the room itself, but by the control of everything that crosses that boundary. This does not concern only consumables. Tools, trolleys, wheels, parts and temporary equipment must also fall under the same transfer regime, because these mixed flows are often where weak points arise.
Which standards and zones govern your transfer process
The transfer set-up is determined by both classification and process risk. ISO classes and GMP Annex 1 requirements complement each other, but are not interchangeable.
| Framework | Focus | What it means for transfer |
|---|---|---|
| ISO 14644 | Particle classification and use of cleanrooms | Determines which environmental control is needed, but not by itself how aseptic transfer should be organised. |
| EU GMP Annex 1 | Aseptic manufacturing, microbiological control, monitoring and evidence | Calls for controlled or validated transfer, appropriate segregation of zones, interlocks, procedures and demonstrable control. |
| Implication for design | Zone boundaries, routes and documentation | This is why a generic price per m² says little without scope, grade, routing and transfer measures. |
Start with a risk assessment for each material stream
- Assess for each stream the risk of product contamination, environmental contamination, cleanability, dimensions, weight and transfer frequency.
- Differentiate between sterile items, cleanroom-packed consumables, reusable tools, trolleys and maintenance supplies; they do not require the same level of control.
- Determine for each material type where outer packaging is removed, whether additional cleaning, disinfection or sterilisation is needed, and in which zone this may take place.
- Record what evidence is required before passage to the next zone, such as label checks, packaging integrity, lot information or certificates.
- Use this assessment as the basis for route, SOP, training and validation, not as a standalone document without operational translation.
Design the route first: receipt, unpacking, airlocks and transfer through
A robust transfer process begins with the complete route: receipt, removal of outer packaging, controlled staging, passage via pass boxes and material airlocks, arrival in the destination zone and a separate waste exit. Personnel and material flows must remain separated, and where relevant incoming and outgoing flows as well. For layout guidance, see cleanroom zoning for personnel and material flows. The more critical the destination, the higher the requirements for fixed routes, door interlocks and controlled handover. Do not forget mobile items. Trolleys, wheels, tools and temporary equipment often move between zones and therefore form a recurring risk if they are not explicitly included in the design and procedures.
Packaging and unpacking steps must be right for each zone
Not every type of packaging offers the same level of protection. A shipping box mainly protects during transport and storage, but is not cleanroom packaging. Double packaging can help to remove layers in stages. Cleanroom packaging is intended to limit the introduction of contamination, while sterile barrier systems are intended to maintain sterility until the moment of use. That distinction is important, because a wrong assumption about the packaging can directly lead to an incorrect transfer step.
The main rule is that the cleanest layer remains protected for as long as possible. You therefore remove outer packaging before the critical boundary, after which the next layer is only opened in the correct intermediate or destination zone. Where you unpack therefore partly determines which contamination risk you accept.
Before passage, always check the integrity of the packaging, the correctness of labels and the validity of claims about cleanliness or sterility. In addition, ask for supplier information that is operationally usable: packaging configuration, lot identity, shelf life and, where relevant, certificates or evidence of sterility. Without that information, release into a more critical area is often insufficiently substantiated. For closed transfer into higher grades, compare options in isolator vs RABS for aseptic production.
Choose carefully between cleaning, disinfecting and sterilising
These three measures have a different purpose and are not interchangeable.
| Method | Purpose | When to apply | Key limitations |
|---|---|---|---|
| Cleaning | Removal of visible dirt, dust, residues and part of the bioburden | Before further treatment or when surfaces are soiled | Without soil removal, a disinfectant often works less effectively. |
| Disinfecting | Reducing the microbiological load on a surface | After cleaning or on packaging and items that are clean under controlled conditions, in accordance with procedure | Effectiveness depends on correct wipe technique, full wetting and the prescribed wet contact time. |
| Sterilising | Achieving a sterile state according to the selected and validated method | For materials that must enter a critical aseptic step in a sterile state | Not every item is suitable due to material compatibility, adhesives, inks, polymers or shape complexity. |
Also pay attention to safety and compatibility. Alcohol-containing agents can be flammable, while surfaces, markings and plastics may be susceptible to damage. Sterile IPA and cleanroom wipes are therefore useful tools, but never automatic proof that an item is suitable for aseptic use. Only the combination of the right method, correct execution and appropriate evidence makes the transfer controlled. Align these measures with your cleanroom cleaning and disinfection protocol.
Human action remains the critical link in material transfer too
Even a well-designed cleanroom with the right air handling and airlocks still depends on human action. Only trained and correctly gowned employees should be allowed to unpack materials, wipe them down, place them in pass-throughs or present them to a higher grade. Discipline matters especially at the boundary between zones: hand hygiene, careful handling of contact surfaces, avoiding unnecessary handling and responding immediately to damaged garments or packaging.
Many deviations are caused not by a fault in the room, but by small behavioural errors during transfer. Think of touching a clean inner layer after contact with outer packaging, opening material too early, or parking a trolley in the wrong place so that wheels carry contamination into the next zone. That is why training should explain not only what the step is, but also why it takes place at that point in the route.
In aseptic programmes, such as pharmaceutical cleanrooms with Grade A and B, the requirements are even higher. These include specific rules of behaviour, operator qualification and periodic requalification, because the transfer can directly affect product safety. The operator must be demonstrably able to work consistently within the established procedure.
Operator safety also remains relevant. Disinfectants must be handled safely, repeated transfers require attention to ergonomics, and temporary or large items must not lead to unsafe working postures. Working in a cleanroom is not in itself unhealthy in that sense; it becomes safe when agents, pressure differentials and ventilation, PPE and procedures are aligned with the work and followed consistently.
Translate the process into one workable SOP with status control
- Describe a fixed sequence: receipt, segregation, inspection, any treatment, phased transfer, opening, presentation and storage or immediate use.
- For each step, define which zone is responsible for unpacking, cleaning, disinfecting, labelling and release.
- Build in status checks for quarantine, release and rejection, so that unclear items do not still enter the next zone.
- Always check item identity, lot number, expiry date, route designation and packaging integrity before passage is allowed.
- Record which materials have entered under which conditions, including transfer logs, labels, certificates and other supporting documents where relevant.
- Include separate instructions for routine replenishment, large or heavy items, return flows, urgent requests and maintenance situations.
- Keep the SOP practical and workable. A procedure that only works on paper, but is not feasible under time pressure, is rarely followed consistently in practice.
Assure the process with validation, monitoring and evidence
A transfer process is only robust when design, execution and evidence support each other. That requires transfer validation, approved item lists, controlled door and alarm logic, verification of packaging integrity and suitable monitoring evidence. In aseptic applications, microbiological monitoring and operator or process qualification can be an explicit part of the approach. Therefore place material transfer within the broader contamination control strategy. That way, changes, deviations, maintenance and requalification remain controlled throughout the entire lifecycle, rather than each incident having to be solved separately.
Common mistakes in material transfer
- Particles or contamination after trolley transfer, while wheels, undercarriages and parking locations were not included in the route analysis.
- Contamination because material was unpacked too early and the cleanest packaging layer was exposed to the environment unnecessarily long.
- Insufficient disinfection due to the wrong wipe direction, too little wetting or too short a contact time.
- Failing or missing labels, making status, lot, shelf life or release unclear at the boundary between zones.
- Wrong items in higher zones, for example contractor tools or urgent maintenance material outside the standard transfer process.
- CAPA that only corrects the immediate error. More lasting improvement often requires tightening the SOP, training, routing, material choice or validation.
Frequently asked questions
Related articles
Cleanroom interlock: operation, types and design considerations
A cleanroom interlock prevents…
Cleanroom smoke study
A smoke study makes airflow vi…

FFU vs AHU in Cleanrooms
The short answer: an AHU condi…
